Using letsencrypt.org SSL certificates
Tue, Nov 24, 2015Last weekend I registered this domain, set it all up in AWS (S3 & CloudFront - I’ll post about that some other time) and registered for the letsencrypt.org closed beta (the open beta starts in December). Let’s Encrypt is an initiative to provide free SSL certificates, for anyone, anywhere. You can read up on the reasons and how it is done on their About page. Today I received an email saying I was accepted. Here’s how I set this up. My specific use case is for this blog which is hosted as a static web site in AWS S3 via CloudFront but the usage of the Let’s Encrypt tool will be much the same for other server software.
- You will be using sudo a lot — letsencrypt sets very restrictive permissions on the directories where your cert files will be stored. That’s a good thing, but sudo’ing all the time is a pain so I did
sudo bashtemporarily. Install:
git clone https://github.com/letsencrypt/letsencrypt./letsencrypt-auto --server https://acme-v01.api.letsencrypt.org/directory --helpgrep: /etc/os-release: No such file or directory WARNING: Mac OS X support is very experimental at present... if you would like to work on improving it, please ensure you have backups and then run this script again with the --debug flag!Well, OK then. What’s the worst that could happen?
./letsencrypt-auto --server https://acme-v01.api.letsencrypt.org/directory --help --debugletsencrypt now installs a bunch of stuff via homebrew (which I had installed already): libxml2, augeas, dialog and virtualenv. If you didn’t sudo before you will get an error at the point of installing virtualenv:
IOError: [Errno 13] Permission denied: '/Library/Python/2.7/site-packages/virtualenv.py'Yay, we get to the help screen:
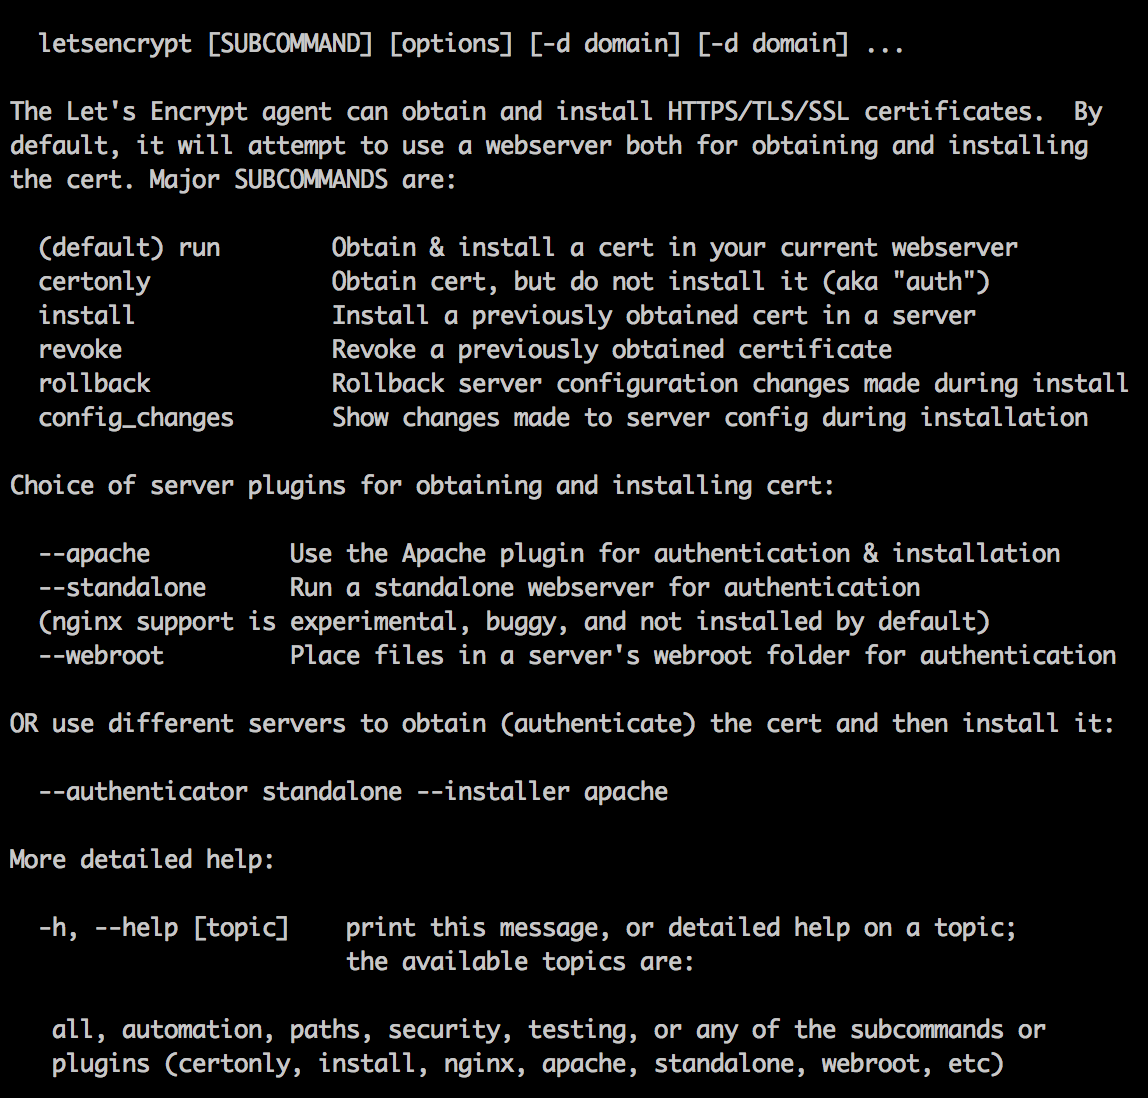
OK, I am going to use this certificate with CloudFront which is not a supported web server plugin (the plugins allow you to run the cert application process on the destination server directly). No worries, the email I received says I can use the –manual option:
./letsencrypt-auto certonly -a manual -d www.paulwakeford.info --server https://acme-v01.api.letsencrypt.org/directory --agree-dev-preview --debugEnter email address.
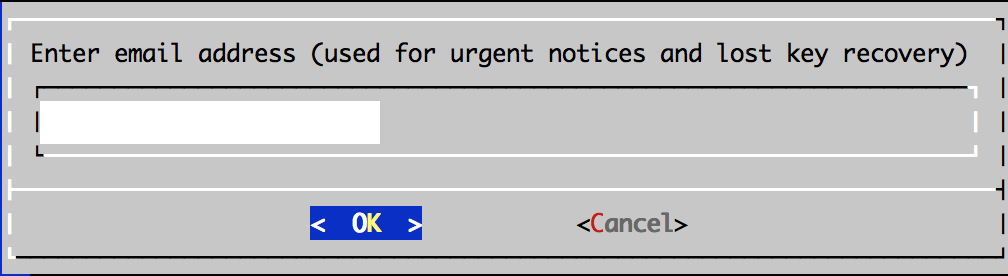
Email is used to recovery, but back up your keys:
“IMPORTANT NOTES:
- If you lose your account credentials, you can recover through e-mails sent to xxxxxxx@xxxxxxx.com.
- Your account credentials have been saved in your Let’s Encrypt configuration directory at /etc/letsencrypt. You should make a secure backup of this folder now. This configuration directory will also contain certificates and private keys obtained by Let’s Encrypt so making regular backups of this folder is ideal.”
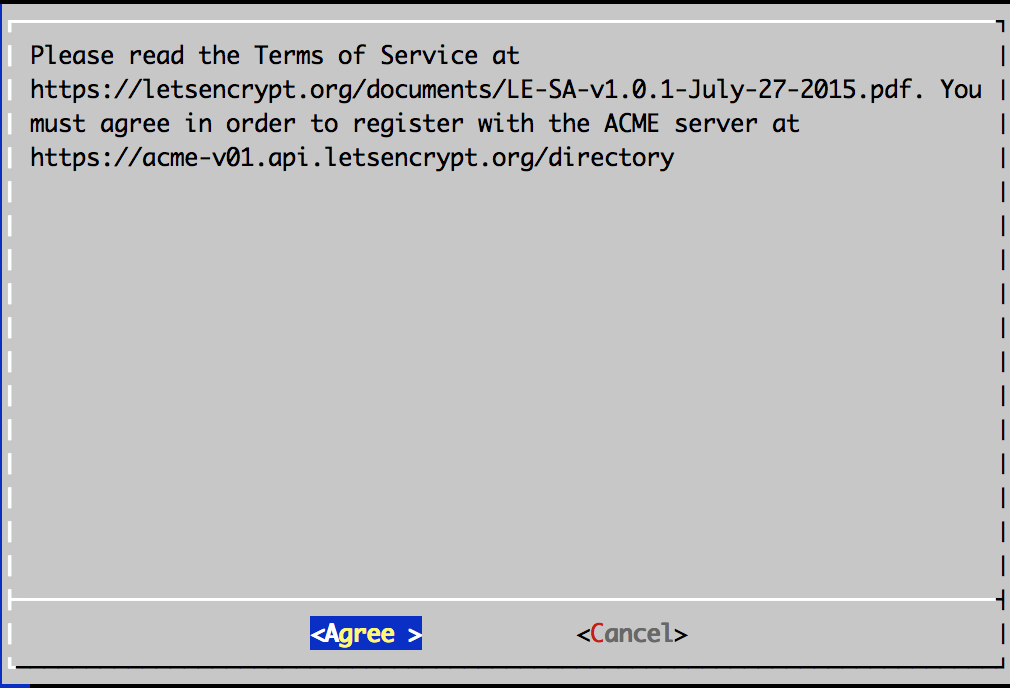
Accept terms.
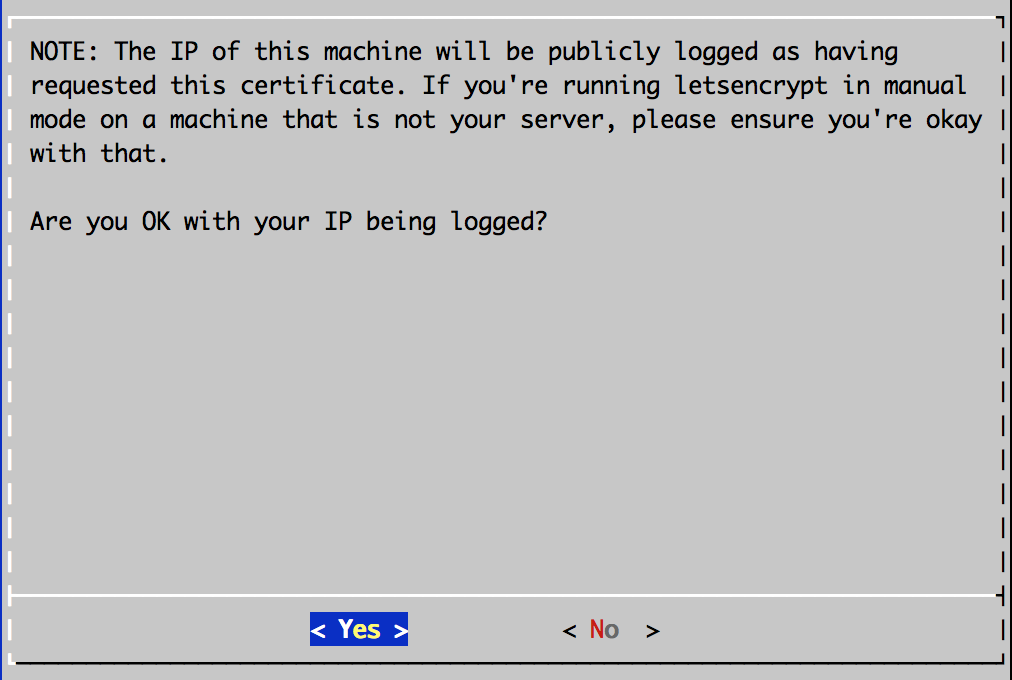
Your IP will be logged.
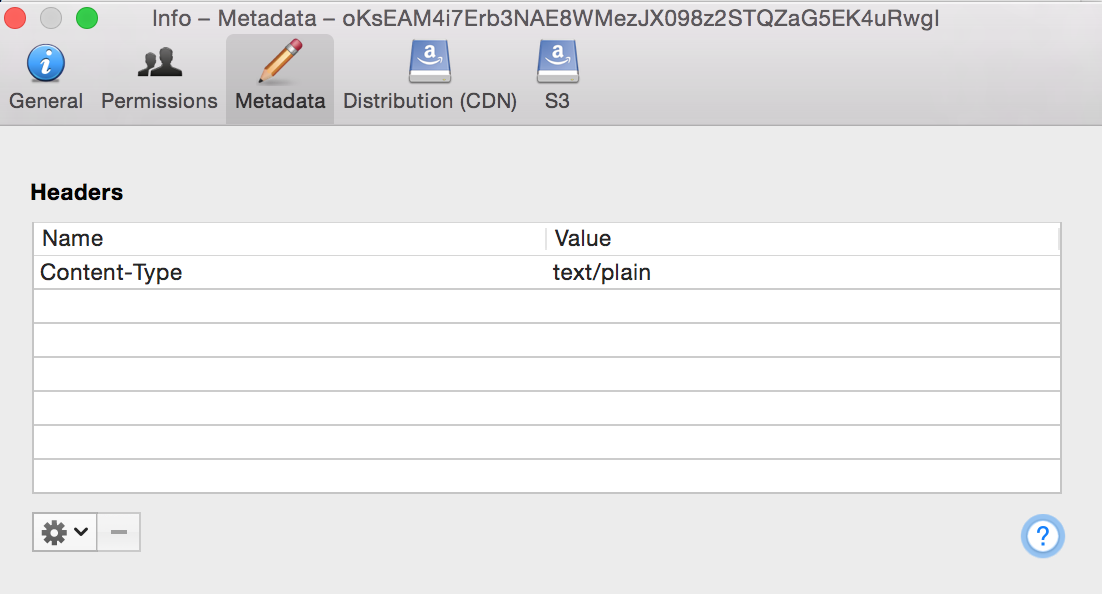
Next you need to prove you own the domain that will be covered by this SSL certificate. Let’s Encrypt does this by checking a URL on the server hosting that domain. You will be asked to create a file with a specific name and containing specific content. Instructions are given for this, including running a temporary HTTP server using Python, if required. I just created the file in the S3 bucket that hosts my web site and edited it to add the required content. You need to set the content-type to text/plain which my S3 file client of choice, Cyberduck, can do (right click, Info:
 If you are running Let’s Encrypt on a supported web server (Apache etc) I’m guessing it will create this file and contents for you.
I got a failure message at this point
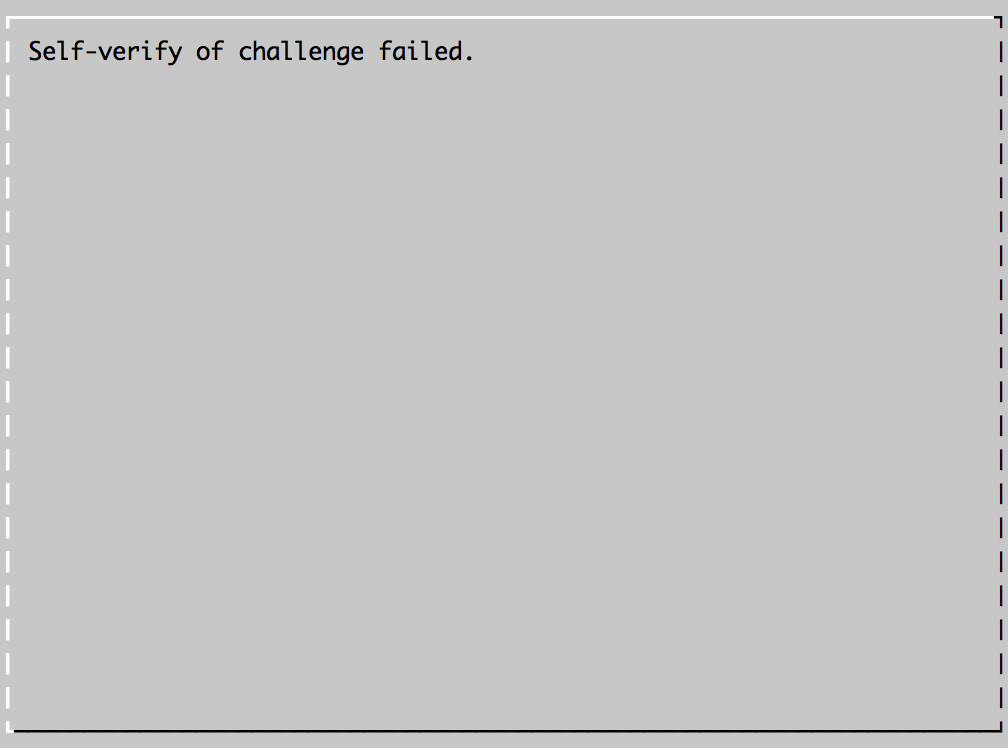 .. however also, a success message:
“IMPORTANT NOTES:
- Congratulations! Your certificate and chain have been saved at /etc/letsencrypt/live/www.paulwakeford.info/fullchain.pem. Your cert will expire on 2016-02-22. To obtain a new version of the certificate in the future, simply run Let’s Encrypt again.”
Let’s check what we won:
bash-3.2# ls /etc/letsencrypt/live/www.paulwakeford.info/cert.pem chain.pem fullchain.pem privkey.pemGreat, now we just need to import it into the IAM keystore in AWS:
aws --profile personal iam upload-server-certificate --server-certificate-name www.paulwakeford.info-ssl --certificate-body file:///etc/letsencrypt/live/www.paulwakeford.info/cert.pem --private-key file:///etc/letsencrypt/live/www.paulwakeford.info/privkey.pem --certificate-chain file:///etc/letsencrypt/live/www.paulwakeford.info/chain.pem --path /cloudfront/prod/Which gives me this response:
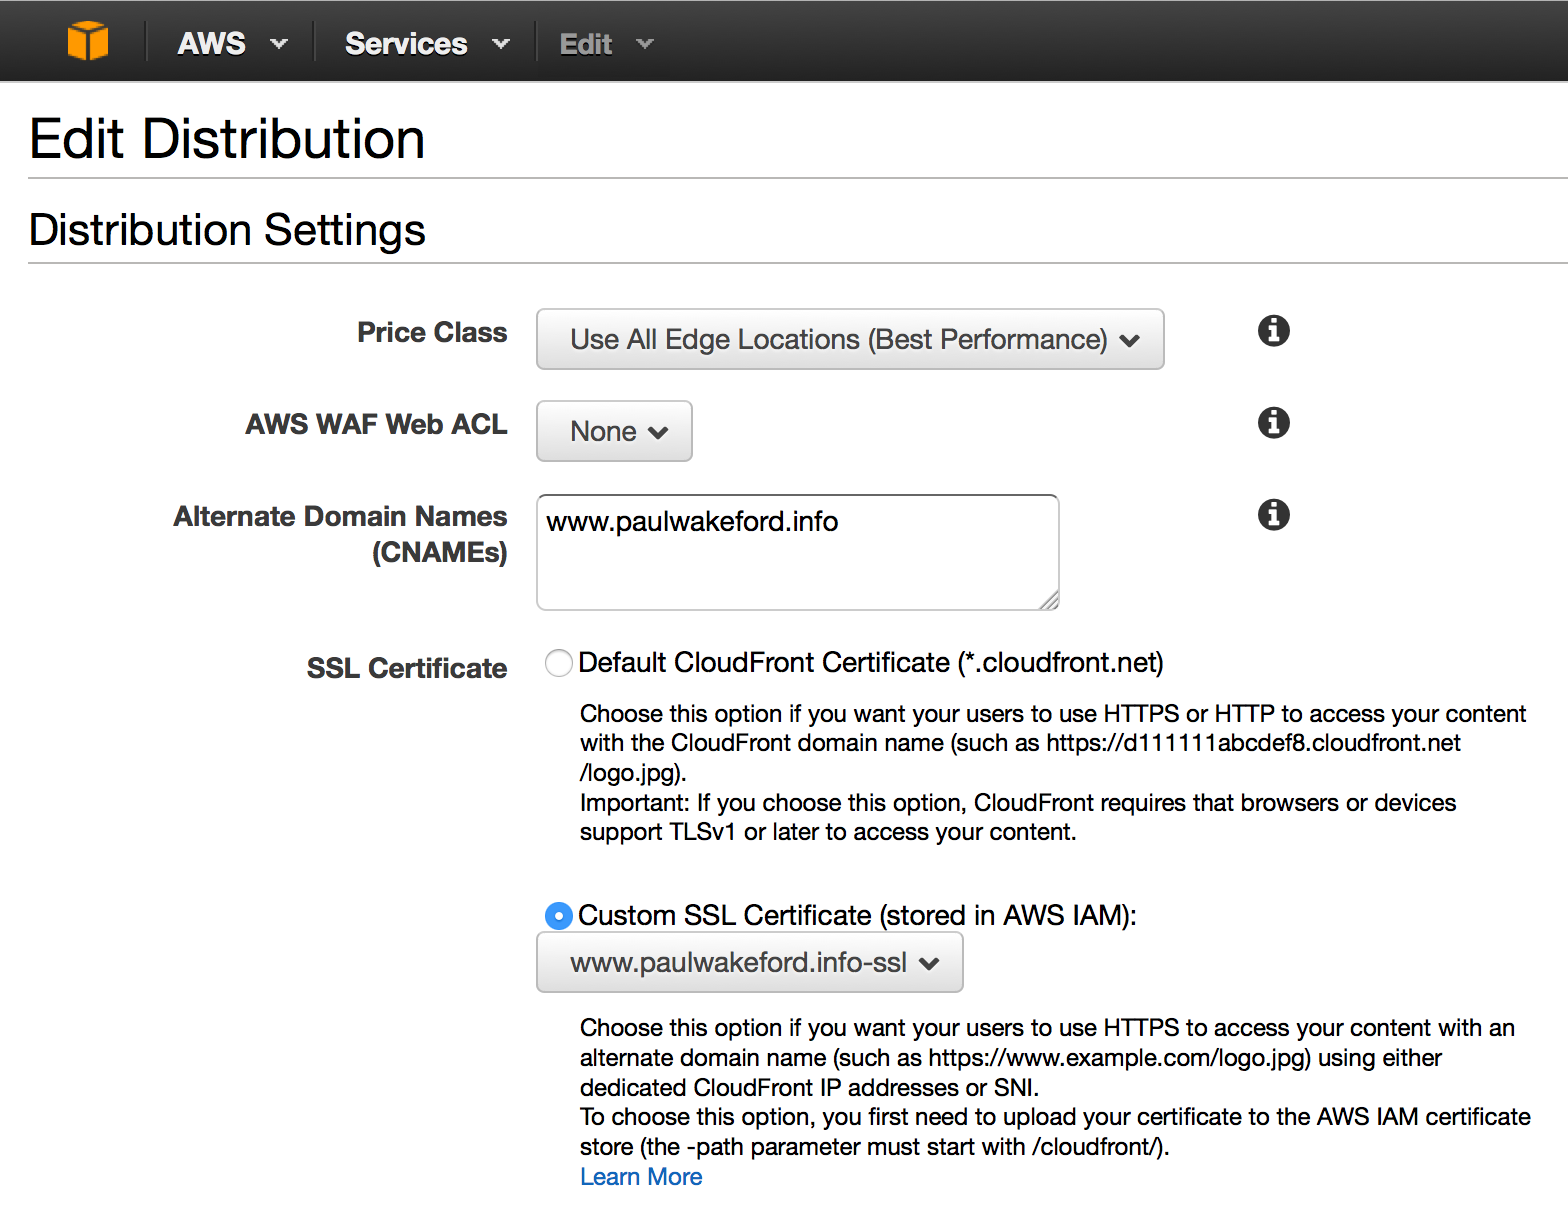
SERVERCERTIFICATEMETADATA arn:aws:iam::1234567890:server-certificate/cloudfront/prod/www.paulwakeford.info-ssl 2016-02-22T01:48:00Z /cloudfront/prod/ ASCAJFRF4MINVWC72UNDW www.paulwakeford.info-ssl 2015-11-24T03:05:16.110ZNow I edit my CloudFront distribution to specify my SSL cert:
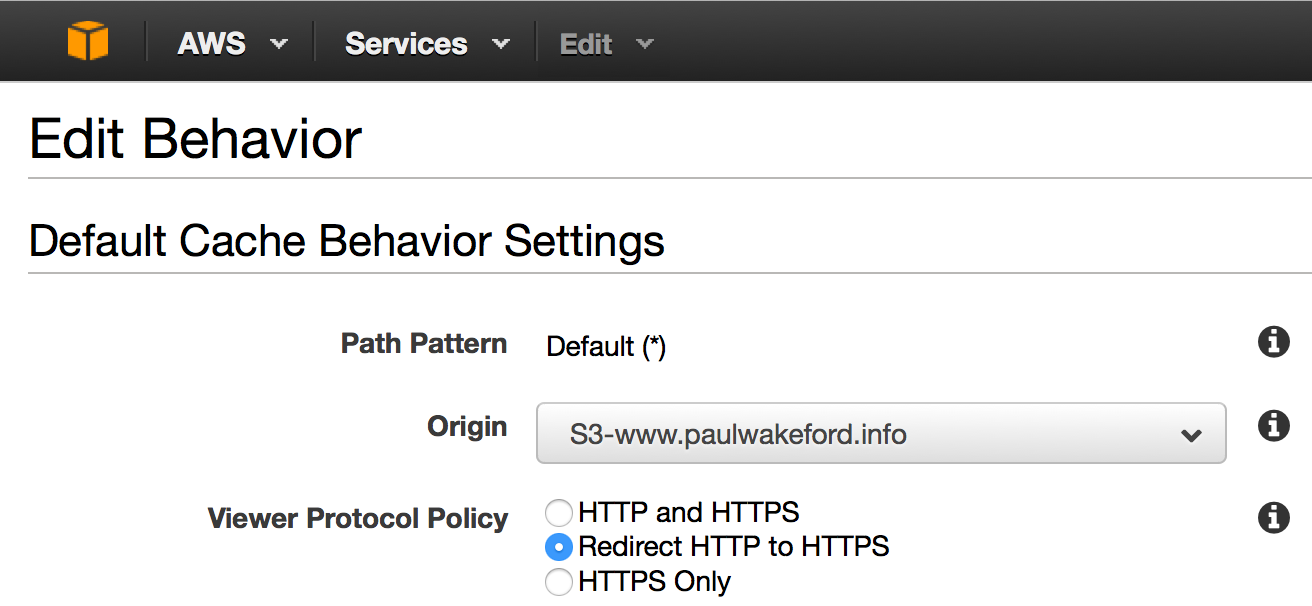
You also probably want to enforce SSL using redirection. This means users will be automatically redirected to the SSL version of your site.
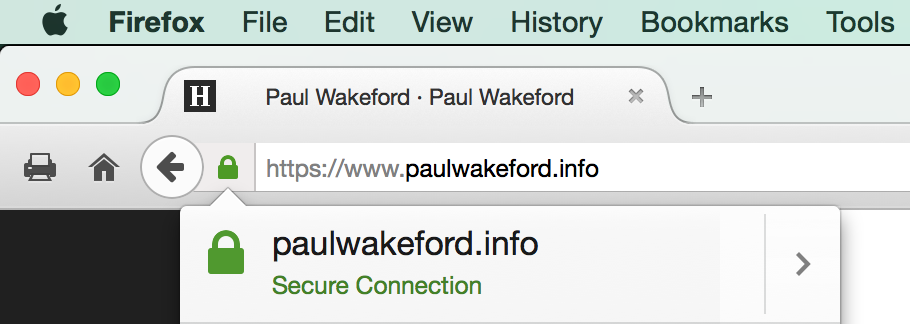
 .
.Great success!
One final wrinkle. Let’s Encrypt certificates are valid for 90 days only — this is a deliberate security mechanism. This means you need to have an automated process in place to renew your certs before they expire — they recommend every 60 days. However they do not yet have that system in place (remember this is still a beta) so certificates currently have to be manually renewed.